Although I wouldn’t recommend doing this unless you absolutely have to, here is a tear down step by step for a Canon EF 80-200mm auto focus lens.
The reason why I’m dismantling this lens is because it was owned at one stage by a heavy smoker and the inner lenses were coated with nicotine. Normally this wouldn’t affect the image that much, but in this case it was a heavy coating and gave a slight glare to bright light and soft focus to most subjects.
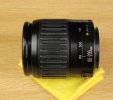
So here we go then.
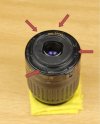
The first job is to remove the mounting ring from the back of the lens. On the EF lens there are four screws of equal length to remove.
Now remove the two small screws that hold the optical connector in place.
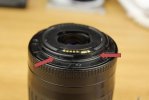
Next is to gently remove the lens mounting ring and place it to one side.
At this point you will see the control board. On our lens it has four ribbon connectors to it. Use a permanent market and mark on ribbon cable and one connector so that you know what way around to replace the board later on.
On the board you will see the connectors have two white squares at the edges. These need to be plied forward to release the cable. Ply them forward together and gently lift the cable out.
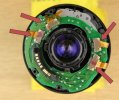
Now you can remove the circuit board.
On the picture below you can see the auto focus motor and gears has been exposed. Remove the two screws that secure the motor and gently pull the mechanism straight up.
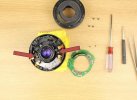
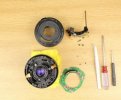
The lens you see here needs to be removed and to do that use two small screw drivers to turn the lens anti clock wise. When you feel the lens click it should be able to be prized up and out. Don’t forget which way round the lens came out as it needs to be placed back in the same way. If you put the lens in upside down the camera will not focus.
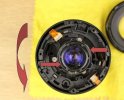
Now remove the three screws that hold the next lens in place and then turn the lens upside down to release the lens. Whilst doing so a diaphragm that sits between the lenses will fall out as well. Just like the lenses remember which way that came out in order to put it back in the right way around.
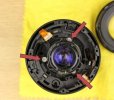
Now it’s time to remove the front lens. Do this by placing a small screwdriver beneath the ring bezel and gently prizing it up.
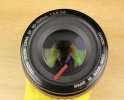
Once the bezel is off hold the lens (hold the lens barrel not the twist zoom) and twist the end clockwise and the lens will come off.
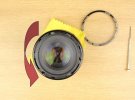
Now the inner lens is exposed remove the three screws and peel the cover back and the lens will come free with the cover.
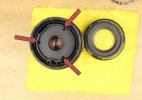
Now only one lens remains in the barrel. There isn’t any point in removing this lens as you can get access to both sides of the lens to clean it.
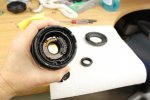
That's it! This pretty much covers most of the EF range in terms of tear down. Simply reverse the actions to refit.
The reason why I’m dismantling this lens is because it was owned at one stage by a heavy smoker and the inner lenses were coated with nicotine. Normally this wouldn’t affect the image that much, but in this case it was a heavy coating and gave a slight glare to bright light and soft focus to most subjects.

So here we go then.
The first job is to remove the mounting ring from the back of the lens. On the EF lens there are four screws of equal length to remove.

Now remove the two small screws that hold the optical connector in place.

Next is to gently remove the lens mounting ring and place it to one side.
At this point you will see the control board. On our lens it has four ribbon connectors to it. Use a permanent market and mark on ribbon cable and one connector so that you know what way around to replace the board later on.
On the board you will see the connectors have two white squares at the edges. These need to be plied forward to release the cable. Ply them forward together and gently lift the cable out.

Now you can remove the circuit board.
On the picture below you can see the auto focus motor and gears has been exposed. Remove the two screws that secure the motor and gently pull the mechanism straight up.


The lens you see here needs to be removed and to do that use two small screw drivers to turn the lens anti clock wise. When you feel the lens click it should be able to be prized up and out. Don’t forget which way round the lens came out as it needs to be placed back in the same way. If you put the lens in upside down the camera will not focus.

Now remove the three screws that hold the next lens in place and then turn the lens upside down to release the lens. Whilst doing so a diaphragm that sits between the lenses will fall out as well. Just like the lenses remember which way that came out in order to put it back in the right way around.

Now it’s time to remove the front lens. Do this by placing a small screwdriver beneath the ring bezel and gently prizing it up.

Once the bezel is off hold the lens (hold the lens barrel not the twist zoom) and twist the end clockwise and the lens will come off.

Now the inner lens is exposed remove the three screws and peel the cover back and the lens will come free with the cover.

Now only one lens remains in the barrel. There isn’t any point in removing this lens as you can get access to both sides of the lens to clean it.

That's it! This pretty much covers most of the EF range in terms of tear down. Simply reverse the actions to refit.

